Web3 Beginner Series: Exploring Login with Solana Token
NFT (non-fungible token) is a "non-fungible" token as its name implies, which is very suitable for use as an identity authentication tool.
Next, let's explore the feasibility of using NFT as a registration credential through a simple example.
Preface
Before we get started, let me introduce the tools we will be using.
SPL Token
We can write a new Solana contract from scratch, but for our current purpose, we can directly use the general implementation provided by Solana: Token Program
The Token Program is part of the Solana Program Library (SPL, https://spl.solana.com/). SPL provides multiple common program implementations including Token, Swap, and Memo, as well as complete client libraries, CLI and other tools, which greatly facilitates Solana developers.
The Token Program project source code is located at: https://github.com/solana-labs/solana-program-library/tree/master/token/program
Solana Playground
Solpy (https://beta.solpg.io/) provides an environment for writing and deploying Solana contracts online, and includes some commonly used tools by default, including the SPL Token introduced in the previous section. It allows us to easily create and manage Tokens through spl-token-cli.
Auth Token
In this section, we will create an NFT Token. If the user mints the Token, it is considered that the wallet address has been registered in our system. Otherwise, the user will be prompted to register first.
Now, let's start with the On-chain part:
Creating a Token
We use spl-token to create a new token, and use --decimals to specify that it is an indivisible token (like an NFT)
spl-token create-token --decimals 0The following log will be output:
$ spl-token create-token --decimals 0
Creating token 69yXraTu3FqXZkATg6MiRnWT2qHd4tRzWsfCHHE9j2XE

Address:  69yXraTu3FqXZkATg6MiRnWT2qHd4tRzWsfCHHE9j2XE
Decimals:  0

Signature: Rih6V8eFd2sakwH4HKmFiT5c2KKFYv74MYf9uVrSaYgK8wm5txUjsNVqEwLvfrGUxMCeLguj16GGssLBDKW1nWC
The 69yXraTu3FqXZkATg6MiRnWT2qHd4tRzWsfCHHE9j2XE is often referred to as the Mint Address, which is also the ID of the Token we created.
The token address is:
https://solscan.io/token/69yXraTu3FqXZkATg6MiRnWT2qHd4tRzWsfCHHE9j2XE?cluster=devnet
Create a Token Account
Next we need to create a Token Account for the Token created in the previous step.
$ spl-token create-account 69yXraTu3FqXZkATg6MiRnWT2qHd4tRzWsfCHHE9j2XE
Creating account 5aYfSTyPL4U4cEZgoMrUWvCJwLv5XYSqVD56R6KXg3Ab

Signature: 3QQvGRmpQSPPYQDVAxurGszgorffb3WdxZ2vkapnxWRhDf9sCQ3baFi5CmAorsfZYFUnexvA9h6c37EifXDgeNSm
mint
Before minting new tokens with other wallet addresses, let’s try to mint a token unit for the token account created in the previous step. Just enter:
$ spl-token mint 69yXraTu3FqXZkATg6MiRnWT2qHd4tRzWsfCHHE9j2XE 1 5aYfSTyPL4U4cEZgoMrUWvCJwLv5XYSqVD56R6KXg3AbThe following log will be output:
$ spl-token mint 69yXraTu3FqXZkATg6MiRnWT2qHd4tRzWsfCHHE9j2XE 1 5aYfSTyPL4U4cEZgoMrUWvCJwLv5XYSqVD56R6KXg3Ab
Minting 1 tokens
  Token: 69yXraTu3FqXZkATg6MiRnWT2qHd4tRzWsfCHHE9j2XE
  Recipient: 5aYfSTyPL4U4cEZgoMrUWvCJwLv5XYSqVD56R6KXg3Ab

Signature: dgZdk963RFK1hhBJLxdk6YQ58uXa3Wd9zGJuAcbvwP7CQryTsRJKzmK7XgZFgeVd78M5Xo2HmFqrcsjBVeeg9BM
Or you can:
$ spl-token mint 69yXraTu3FqXZkATg6MiRnWT2qHd4tRzWsfCHHE9j2XE 1
Minting 1 tokens
  Token: 69yXraTu3FqXZkATg6MiRnWT2qHd4tRzWsfCHHE9j2XE
  Recipient: 5aYfSTyPL4U4cEZgoMrUWvCJwLv5XYSqVD56R6KXg3Ab

Signature: 2QYAWdq1zybgPd52ASV2RXPzoKTF9e1kaEawh5pa4MAtXAmsZTQmoxMbYmUM1ui3YNRk8s4T1fFthguhJjKE3pmK
You can also try mint with other values, such as 1.9:
$ spl-token mint 69yXraTu3FqXZkATg6MiRnWT2qHd4tRzWsfCHHE9j2XE 1.9 5aYfSTyPL4U4cEZgoMrUWvCJwLv5XYSqVD56R6KXg3Ab
Minting 1.9 tokens
  Token: 69yXraTu3FqXZkATg6MiRnWT2qHd4tRzWsfCHHE9j2XE
  Recipient: 5aYfSTyPL4U4cEZgoMrUWvCJwLv5XYSqVD56R6KXg3Ab

Signature: 57jShkLTWHnV4G3RENDbarFCjRkWrP3TGnQcSwyRCFEJEoR2BJYwquNHQTLuqEdDp5wtoAujWYVZupkS3TLgv9Hp
Checking the transaction details, we can see that: since we specified --decimals as 0 when creating the token in the first step, the decimal part will be discarded when the mint is actually executed, so the mint amount will still be 1
You can also try to mint tokens directly to a wallet address. Here we use 4wztJ4CAH4GbAUopZrVk7nLvoAC3KAF6ttMMWfnBRG1t to demonstrate:
spl-token mint 69yXraTu3FqXZkATg6MiRnWT2qHd4tRzWsfCHHE9j2XE 1 4wztJ4CAH4GbAUopZrVk7nLvoAC3KAF6ttMMWfnBRG1tmint for wallet address
The target of the above mint operation is the Token Mint Address, and according to our original idea, we should mint other wallet addresses that do not belong to us.
Next, let's use the wallet address of the Web3 user to complete the above mint step.
- Token we directly use the above
69yXraTu3FqXZkATg6MiRnWT2qHd4tRzWsfCHHE9j2XEToken 我们直接使用上面的 69yXraTu3FqXZkATg6MiRnWT2qHd4tRzWsfCHHE9j2XE
- Wallet Address:use
4wztJ4CAH4GbAUopZrVk7nLvoAC3KAF6ttMMWfnBRG1t
But when we simply replace the parameters, we get unexpected results:
$ spl-token mint 69yXraTu3FqXZkATg6MiRnWT2qHd4tRzWsfCHHE9j2XE 1 4wztJ4CAH4GbAUopZrVk7nLvoAC3KAF6ttMMWfnBRG1t
Minting 1 tokens
  Token: 69yXraTu3FqXZkATg6MiRnWT2qHd4tRzWsfCHHE9j2XE
  Recipient: 4wztJ4CAH4GbAUopZrVk7nLvoAC3KAF6ttMMWfnBRG1t
Process error: Client error: AccountNotFound: pubkey=4wztJ4CAH4GbAUopZrVk7nLvoAC3KAF6ttMMWfnBRG1t
The address does exist, but the address required by Mint is not the original wallet address, but the Token Account associated with it.
We need to follow the same process as above: create a Token Account for the wallet address, and then use the created Token Account to mint a new Token unit:
In other words, if we want to mint a Token unit for a certain wallet address, we must first create a Token Account for this wallet address. As for why we need to do this, one of the reasons is that we do not have the authority to directly modify the data of a certain address.
In Solana’s documentation, you’ll sometimes see two similar concepts: Token Account and Associated Token Account (ATA). It seems like the two are related, but it’s not clear, which is very confusing.
However, if you look at Metaplex’s documentation, it clearly states: “Associated Token Account, sometimes referred to as Token Account”.
We won’t delve into the two here, just imagine that the token account is the medium between the token and the wallet address.
We use the following command to create a Token Account for the wallet address:
$ spl-token create-account 69yXraTu3FqXZkATg6MiRnWT2qHd4tRzWsfCHHE9j2XE --owner 4wztJ4CAH4GbAUopZrVk7nLvoAC3KAF6ttMMWfnBRG1t
Creating account 3JocyxV4LX4VbNU248CvNozZphgRW5JTyxn7FPWrF8bx

Signature: 2ooUu2o1GiPMPFLR7XpLVEHxvV3b4FiBDfXR48DcL2WxuUbEEudddqdNFeLdTVTqnj3jUpqXP7TpsjhGH9fKKPw5
Duplicate creation will result in an error:
$ spl-token create-account 69yXraTu3FqXZkATg6MiRnWT2qHd4tRzWsfCHHE9j2XE --owner 4wztJ4CAH4GbAUopZrVk7nLvoAC3KAF6ttMMWfnBRG1t
Creating account 3JocyxV4LX4VbNU248CvNozZphgRW5JTyxn7FPWrF8bx
Process error: Error: Account already exists: 3JocyxV4LX4VbNU248CvNozZphgRW5JTyxn7FPWrF8bx
It can also be seen in the log that the Token Account derived from the determined Mint Account and wallet address is certain (3JocyxV4LX4VbNU248CvNozZphgRW5JTyxn7FPWrF8bx), but the error message is printed because it already exists.
Get Token Account
We need to use the RPC interface to get whether a wallet address has minted the NFT we created. Specifically, use the getTokenAccountsByOwner method to query the data. The following are the parameters required by the interface:
curl --request POST \
  --url __YOUR_RPC_PROVIDER__ \
  --header 'content-type: application/json' \
  --header 'user-agent: vscode-restclient' \
  --data '
{
  "id": 1,
  "jsonrpc": "2.0",
  "method": "getTokenAccountsByOwner",
  "params": [
    __WALLET_ADDRESS__,
    {
      "mint": __TOKEN_MINT_ADDRESS__
    },
    {
      "encoding": "jsonParsed",
      "commitment": "recent"
    }
  ]
}
'
You need to replace _YOUR_RPC_PROVIDER_ with the address provided by the RPC provider of your choice.
You can use the address provided by Solana, or you can find a public free RPC network here:
https://zan.top/service/public-rpc/solana
Note: Public addresses may be unstable. If you need a stable RPC service, it is recommended to create your own API Key.
For the wallet address above, this is what it looks like:
curl --request POST \
  --url 'https://zan.top/service/public-rpc/solana' \
  --header 'content-type: application/json' \
  --header 'user-agent: vscode-restclient' \
  --data '{"id": 1,"jsonrpc": "2.0","method": "getTokenAccountsByOwner","params": ["4wztJ4CAH4GbAUopZrVk7nLvoAC3KAF6ttMMWfnBRG1t",{"mint": "69yXraTu3FqXZkATg6MiRnWT2qHd4tRzWsfCHHE9j2XE"},{"encoding": "jsonParsed","commitment": "recent"}]}'如果是一个已经创建过 Account Token 的钱包,则会返回:
In addition to manually filling in request parameters through code, you can also use the getParsedTokenAccountsByOwner method on the Connection provided in @solana/web3.js. Internally, the getParsedTokenAccountsByOwner method is actually called through the RPC interface provided when creating the Connection.
If it is a wallet that has created an Account Token, it will return:
{
  "result": {
    "value": [
      {
        "account": {
          "data": {
            "parsed": {
              "info": {
                "mint": "69yXraTu3FqXZkATg6MiRnWT2qHd4tRzWsfCHHE9j2XE",
                "owner": "4wztJ4CAH4GbAUopZrVk7nLvoAC3KAF6ttMMWfnBRG1t",
                "tokenAmount": {
                  "amount": "1"
                }
              },
            },
          },
        },
        "pubkey": "3JocyxV4LX4VbNU248CvNozZphgRW5JTyxn7FPWrF8bx"
      }
    ]
  }
}
Deleted the data that was not useful to us.
accomplish
Through the above attempts, we can see that we can use the existing capabilities to achieve the functions we want. Then, we will start writing the client code.
The following codes are all in https://github.com/gin-lsl/my-sol-token-auth-example
You can preview it here: https://my-sol-token-auth-example.vercel.app/
I will implement it by creating a simple Nextjs project and using Ant Design Web3 to Connect Wallet:
Initialize Nextjs project
$ npx create-next-app@latest my-sol-token-auth-exampleAll options use default values:

To get started quickly, we will directly use @ant-design/web3-solana to connect the wallet and use @solana/spl-token to interact with the Token Program.
Add related dependencies:
npm i antd @ant-design/web3 @ant-design/web3-solana @solana/web3.js @solana/spl-tokenWe need to include 3 pages on the homepage, creating app/sign-in/page.tsx and app/sign-on/page.tsx. They are used to connect to the wallet and check whether the user has registered (whether to mint NFT), and let the user go through the registration process (mint NFT).
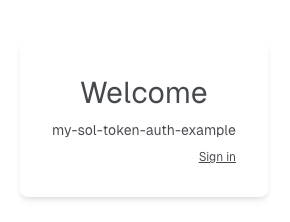
After opening the demo page, the first thing you see is a welcome message and a link to the Sign in page:

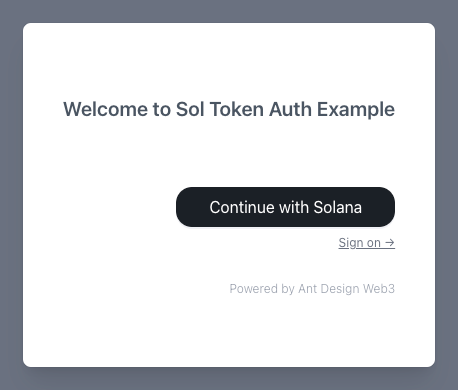
After entering the page, you need to Sign in first:
Click “Continue with Solana” and the wallet will be launched.

If you have not registered before, you will be prompted to register first:

This is because in the logic of /api/sign-in, the associated Token Account will be searched based on the connected wallet address. Since we have not used it before, the data cannot be found, so the system will think that this wallet address has not been registered.
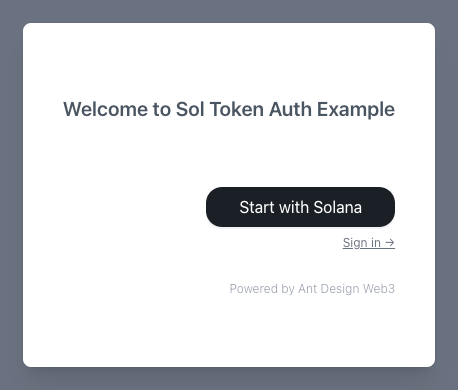
Then we follow the prompts and come to the Sign on page. The registration page is similar to the login page, except that the processing logic on the server is different:
In fact, the two logics can be merged, but they are separated here just for the convenience of demonstration.

Anyway, let’s click “Start with Solana” and connect the wallet. Then, if everything goes well, you will see a success message:

Let’s go to Solscan and see what’s going on. Go to https://solscan.io/?cluster=devnet and query your wallet address. Alternatively, you can check this address: 79reVF46NyuuH7PADR3i6RpQ7hmBZgYkiieXNYPM1oLF
There is a transaction data:

Note that in Instructions, you can see that the CreateAccount instruction is executed inside the transaction. Click the link to enter the details and you will find that it creates a TokenAccount: EXfDYkHw3UQw2VqiSLsRAfLMsxkgqnd3nhxbB4V5HAvA. The isOnCurve value is False, indicating that it is an associated account without a private key.
Go back to the previous page and go to Portfolio -> NFTs. You can see the Mint operation we just did inside sign-on, as well as the NFT we minted:

Summarize
Let's summarize the whole process. We used spl-token-cli to create an NFT, and then we checked whether a wallet address had a Token Account and minted a Token to determine whether it had been registered on our website.
When a Web3 user connects to a wallet, we will automatically send a sign-on to the backend, create a Token Account internally, and mint a Token unit as a proof that the user has registered.
In the future, users can log in to our website again with the same wallet address.
About ZAN
As a technology brand of Ant Digital Technologies for Web3 products and services, ZAN provides rich and reliable services for business innovations and a development platform for Web3 endeavors.
The ZAN product family includes ZAN Node Service, ZAN ZK Acceleration, ZAN Smart Contract Audit (AI Scan/Expert Audit), with more products in the pipeline.