Web3 Beginner Series: Building an NFT DEX from Scratch
Users who have read the previous articles should know that for ERC-20 token protocol, we can use DEXs like Uniswap for trading, achieving decentralization. But how can we achieve decentralized trading for ERC-721 protocol, which is used for NFTs?
Currently, mainstream NFT exchanges adopt an order book approach for trading, similar to displaying goods on supermarket shelves; buyers can take home items if they find the prices suitable.
This article will implement decentralized trading of NFTs through writing smart contracts and a simple front-end page. Please note that this article is for educational purposes only and is not meant for production environments.
NFT(Non-Fungible Token)
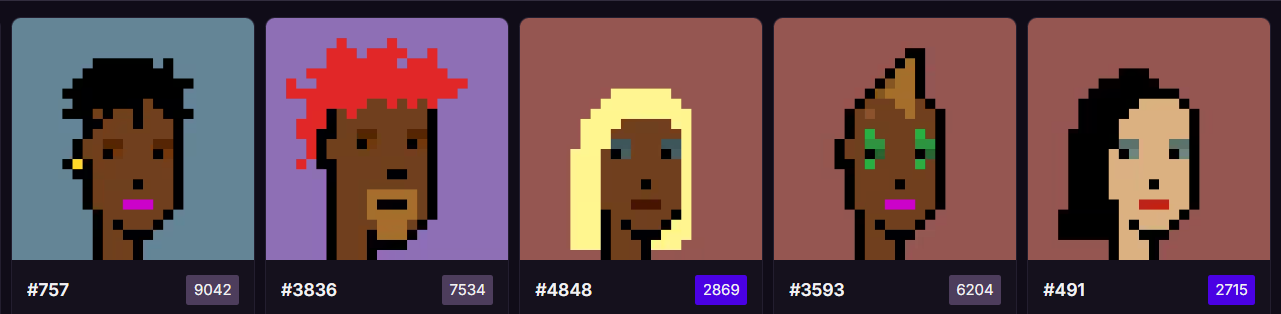
NFTs, or Non-Fungible Tokens, are unique tokens where each token is distinct and follows the ERC-721 protocol. Generally, each NFT in a wallet displays a different image, and each NFT has a unique ID to differentiate it.
Due to the uniqueness of NFTs, they cannot be priced through a price curve like ERC-20 tokens—every token is different. Therefore, the most common trading method currently is through an order book.
Order Book Trading
The order book model simply means that the prices of the goods are set by humans, unlike Uniswap's price calculation through price curves. Order books typically have two trading modes: one is a fixed-price order, where the seller sets a price they have in mind, and if a buyer finds it acceptable, they can proceed to purchase. The other is a buy order, where the buyer places a purchase order based on their demand, and when the seller finds the price acceptable, they can sell.
Generally, the price of buy orders will be lower than that of fixed-price orders. This article will only cover the first pricing method.
Functions of an NFT DEX
The basic functions of an NFT DEX should include the following:
- Listing NFTs: Putting an NFT up for sale at a specified price.
- Purchasing NFTs: Buying an NFT based on its listed price.
- DEX Fees: Collecting fees based on the transaction price.
Listing NFTs
To list an NFT, the following steps need to be taken:
- Front-end: The user selects their NFT and sets a price, then clicks to list it.
- Smart Contract: The user needs to give the contract permission to control their NFT.
After the above steps, the product is listed. In the contract, a map of users’ listed product prices needs to be maintained. This data can typically be stored in a centralized service to reduce the contract's load; however, in this article, we will maintain this map within the contract.
Purchasing NFTs
When purchasing an NFT, the following events occur:
- Front-end: The user selects an NFT they wish to buy and clicks to purchase.
- Smart Contract: The contract processes the transaction by transferring the buyer's funds to the NFT seller and transferring the NFT to the buyer.
Implementing an NFT DEX
In this section, we will implement an NFT DEX from scratch. The author has already deployed a DEX at nft-dex-frontend.vercel.app .
1. Creating an NFT
For testing purposes, it is best to have our own NFT. We can quickly create an ERC-721 NFT using Remix, which offers relevant templates.
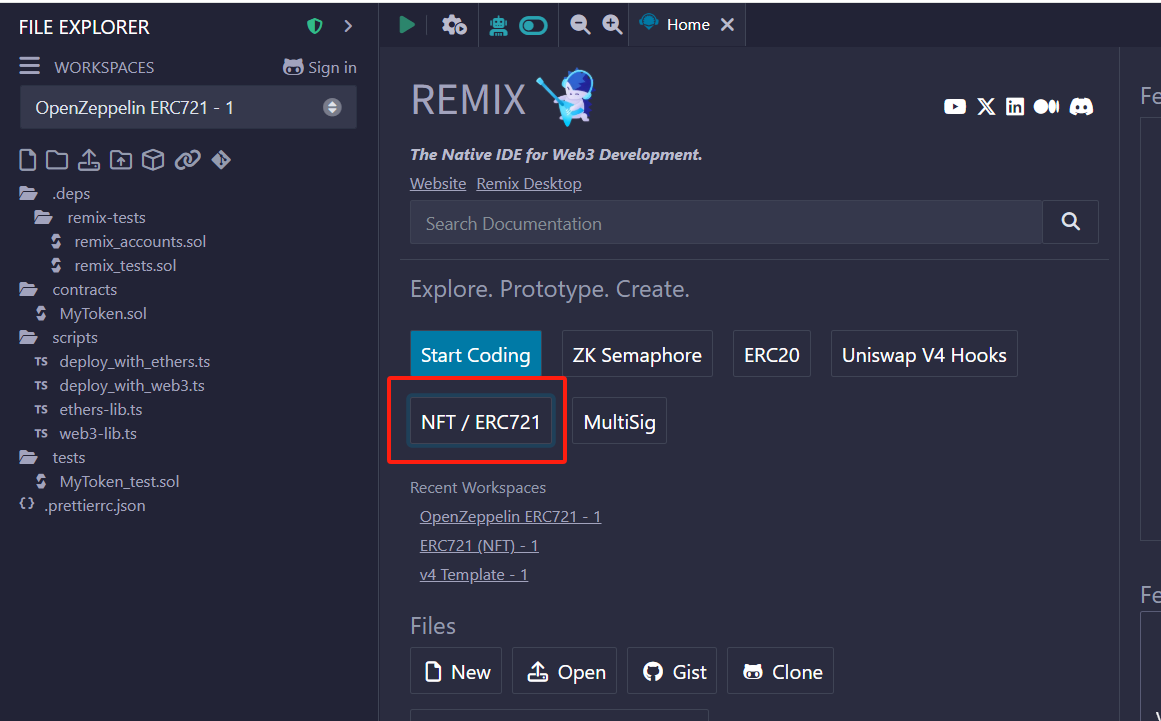
Using this template, we can easily deploy an NFT. Of course, you can skip this step and use the NFT we have prepared.
2. Smart Contract Development
Our contract should include the following methods:
2.1. Seller Lists an NFT
The seller needs to specify the NFT they want to sell and set the corresponding price. When listing, the user must authorize the NFT so that our smart contract has the authority to operate this NFT. This allows the transaction to be executed automatically when a buyer makes a purchase.
The process should be as follows: 1. The user selects their NFT. 2. Sets the price (the pricing can be in stablecoins like USDT, USDC, or ETH). 3. Authorizes the NFT to the contract.
Then, they can invoke the contract's listing method, which should do the following:
- Validate the ownership of the NFT.
- Add a listing record.
- Trigger a listing event.
/**
     * @dev List an NFT for sale
     * @param _nftContract Address of the NFT contract
     * @param _tokenId NFT token ID
     * @param _price Price
     * @param _paymentToken Payment token (0 indicates ETH)
     */
    function listNFT(
        address _nftContract,
        uint256 _tokenId,
        uint256 _price,
        address _paymentToken
    ) external {
        require(_nftContract != address(0), "NFTDEX: NFT contract address cannot be 0");
        require(_price > 0, "NFTDEX: Price must be greater than 0");

        // Ensure the user has approved the exchange contract to transfer the NFT
        IERC721 nft = IERC721(_nftContract);
        require(nft.ownerOf(_tokenId) == msg.sender, "NFTDEX: You are not the owner of this NFT");
        require(
            nft.getApproved(_tokenId) == address(this) ||
            nft.isApprovedForAll(msg.sender, address(this)),
            "NFTDEX: Please authorize the NFT to the exchange first"
        );

        // Create a listing record
        uint256 listingId = currentListingId;
        listings[listingId] = Listing({
            seller: msg.sender,
            nftContract: _nftContract,
            tokenId: _tokenId,
            price: _price,
            paymentToken: _paymentToken,
            isActive: true
        });

        // Add to the seller's list of listings
        sellerListings[msg.sender].push(listingId);

        // Increment the listing ID
        currentListingId++;

        // Emit a listing event
        emit NFTListed(listingId, msg.sender, _nftContract, _tokenId, _price, _paymentToken);
    }
2.2. Buyer Purchases an NFT
When a buyer purchases an NFT, they will simply select the NFT they desire and pay the corresponding tokens. On the contract side, the following steps will execute: 1. Read the corresponding NFT data from listings . 2. Calculate the fee based on the NFT price and deduct this from the transaction amount. 3. Transfer the NFT to the buyer. 4. Trigger a purchase event.
function purchaseNFT(uint256 _listingId) external payable {
    Listing storage listing = listings[_listingId];

    require(listing.isActive, "NFTDEX: This NFT is not listed or has already been sold");
    require(listing.seller != msg.sender, "NFTDEX: Cannot purchase your own NFT");

    address seller = listing.seller;
    address nftContract = listing.nftContract;
    uint256 tokenId = listing.tokenId;
    uint256 price = listing.price;
    address paymentToken = listing.paymentToken;

    // Calculate the platform fee
    uint256 fee = (price * feeRate) / 10000;
    uint256 sellerAmount = price - fee;

    // Handle payment
    if (paymentToken == address(0)) {
        // Pay with ETH
        require(msg.value == price, "NFTDEX: Incorrect payment amount");

        // Transfer ETH to the seller
        (bool success, ) = payable(seller).call{value: sellerAmount}("");
        require(success, "NFTDEX: Failed to transfer ETH to the seller");

        // Platform fee remains in the contract
    } else {
        // Pay with ERC20 tokens
        IERC20 token = IERC20(paymentToken);

        // Transfer tokens to the seller
        require(token.transferFrom(msg.sender, seller, sellerAmount), "NFTDEX: Failed to transfer tokens to the seller");

        // Transfer platform fee to the contract owner
        require(token.transferFrom(msg.sender, owner, fee), "NFTDEX: Failed to transfer platform fee");
    }

    // Transfer NFT
    IERC721(nftContract).safeTransferFrom(seller, msg.sender, tokenId);

    // Update listing status
    listing.isActive = false;

    // Emit a purchase event
    emit NFTPurchased(_listingId, msg.sender, seller, nftContract, tokenId, price, paymentToken);
}
2.3. Cancelling a Listing
Naturally, a seller may feel the price is not appropriate and choose to cancel the listing. We have retained an isActive field in the stored listing information to indicate whether the item is valid. Therefore, when cancelling a listing, we simply need to set this field to false.
function cancelListing(uint256 _listingId) external onlySeller(_listingId) {
  listings[_listingId].isActive = false;
  emit ListingCanceled(_listingId);
}
2.4. Withdrawing Fees
The DEX can charge fees on each transaction; this fee can either be kept in the contract or sent to another address of your choice; in this article, we opt to keep it in the contract.
function withdrawFees() external onlyOwner {
    uint256 balance = address(this).balance;
    require(balance > 0, "NFTDEX: No fees to withdraw");

    (bool success, ) = payable(owner).call{value: balance}("");
    require(success, "NFTDEX: Failed to withdraw fees");
}
With this, the basic functions of our contract are complete.
3. DEX Front-end Development
Before we begin, we need to prepare some tools, including:
- Ant Design Web3: For wallet connection and displaying NFT cards.
- Wagmi: For interacting with wallets.
- Next.js + Vercel: To deploy our project.
Our front-end application should include three pages: Mint, Buy, and Portfolio. The Mint page allows users to mint our NFTs, only for demonstration purposes. The Buy page is our DEX marketplace where users can purchase NFTs, and the Portfolio page allows users to manage their NFTs.
3.1. Connecting Wallets
To connect the user's wallet, we will use Ant Design Web3.
The wallet connection process is quite simple and can be accomplished using the connection component provided by Ant Design Web3.
First, we wrap our project in a Provider, allowing the subsequent code to utilize the capabilities of Ant Design Web3. Given that we need to connect to the Sepolia test network, we recommend using node services to enhance data query speed. Here, we use ZAN's endpoint, which works well in the Asia-Pacific region with fast speeds and reasonable pricing, supporting a wide range of chains.
<WagmiWeb3ConfigProvider
  chains={[Sepolia]}
  transports={{
    [Sepolia.id]: http(zan.endpoint),
  }}
  walletConnect={{
    projectId: 'YOUR ID',
  }}
  eip6963={{
    autoAddInjectedWallets: true,
  }}
  wallets={[
    MetaMask(),
    OkxWallet(),
  ]}
  queryClient={queryClient}
  >
  {children}
</WagmiWeb3ConfigProvider>
Then, place a connection button where wallet connection is needed:
{/* Connect Wallet Button */}
<Connector
  modalProps={{
    mode: 'simple',
  }}
>
  <ConnectButton />
</Connector>
This completes the wallet connection, and it is very straightforward.
3.2. Mint
To mint an NFT, you can obtain test tokens at https://zan.top/faucet/ethereum
On the Mint page, we can mint test NFTs. Minting is an operation that involves writing to the contract, where we will use the useWriteContract method provided by Wagmi. We need to specify the contract address, contract ABI, and contract parameters.
  const { writeContractAsync} = useWriteContract();

  writeContractAsync({
    address: '0x07d3b2cee477291203cd8f1928ee231d583cb908',
    abi: abi,
    functionName: "safeMint",
    args: [address],
  }
Then, you will confirm the transaction in your wallet to successfully mint.
3.3. Portfolio
Managing a User's NFTs
Here we need to display all of the user’s NFTs. We can use some NFT APIs for this, and we’ll utilize the OpenSea API since there are few APIs supporting NFTs on the Sepolia test network.
Once we obtain the user's NFT list, we need to check whether they are already listed for sale. For unlisted NFTs, they should support listing, and for those already listed, they should support delisting. The way to check this is through the DEX contract's getSellerListings method, retrieving the NFTs the user has listed and checking the isAlive field of those NFTs to see if they are currently listed.
const {data: sellerListings, refetch, isLoading} = useReadContract({
  abi: abi,
  address: dexAddress,
  functionName: 'getSellerListings',
  args: [account?.address],
  query: {
    enabled: !!account?.address,
  }
})

const {data: tokensInfo, isLoading: tokensLoding} = useReadContracts({
  contracts: (sellerListings as bigint[] || []).map((listingId) => ({
    abi: abi as Abi, // Ensure abi is explicitly cast to the expected type
    address: dexAddress as `0x${string}`,
    functionName: 'listings',
    args: [listingId],
  })),
  query: {
    enabled: !!sellerListings && (sellerListings as bigint[])?.length > 0,
  }
})

tokensInfo: tokensInfo?.map((item, index) => {
  const result = item.result as any[];
  return {
    seller: result.at(0) as string,
    contract: result.at(1) as string,
    tokenId: result.at(2) as bigint,
    price: result.at(3) as bigint,
    payToken: result.at(4) as string,
    isAlive: result.at(5) as boolean,
    listId: (sellerListings as bigint[] || [])?.at(index),
  }
})
When listing, we need to call the listNFT contract method, and when cancelling, we will need to call the cancelListing method. Before listing, we need to call the NFT authorization method to grant the NFT to the contract so that it can be automatically transferred to the buyer upon transaction completion.
await writeContractAsync({
abi: nftAbi,
address: nftAddress,
functionName: 'approve',
args: [dexAddress, nfts[selectedNft].identifier],
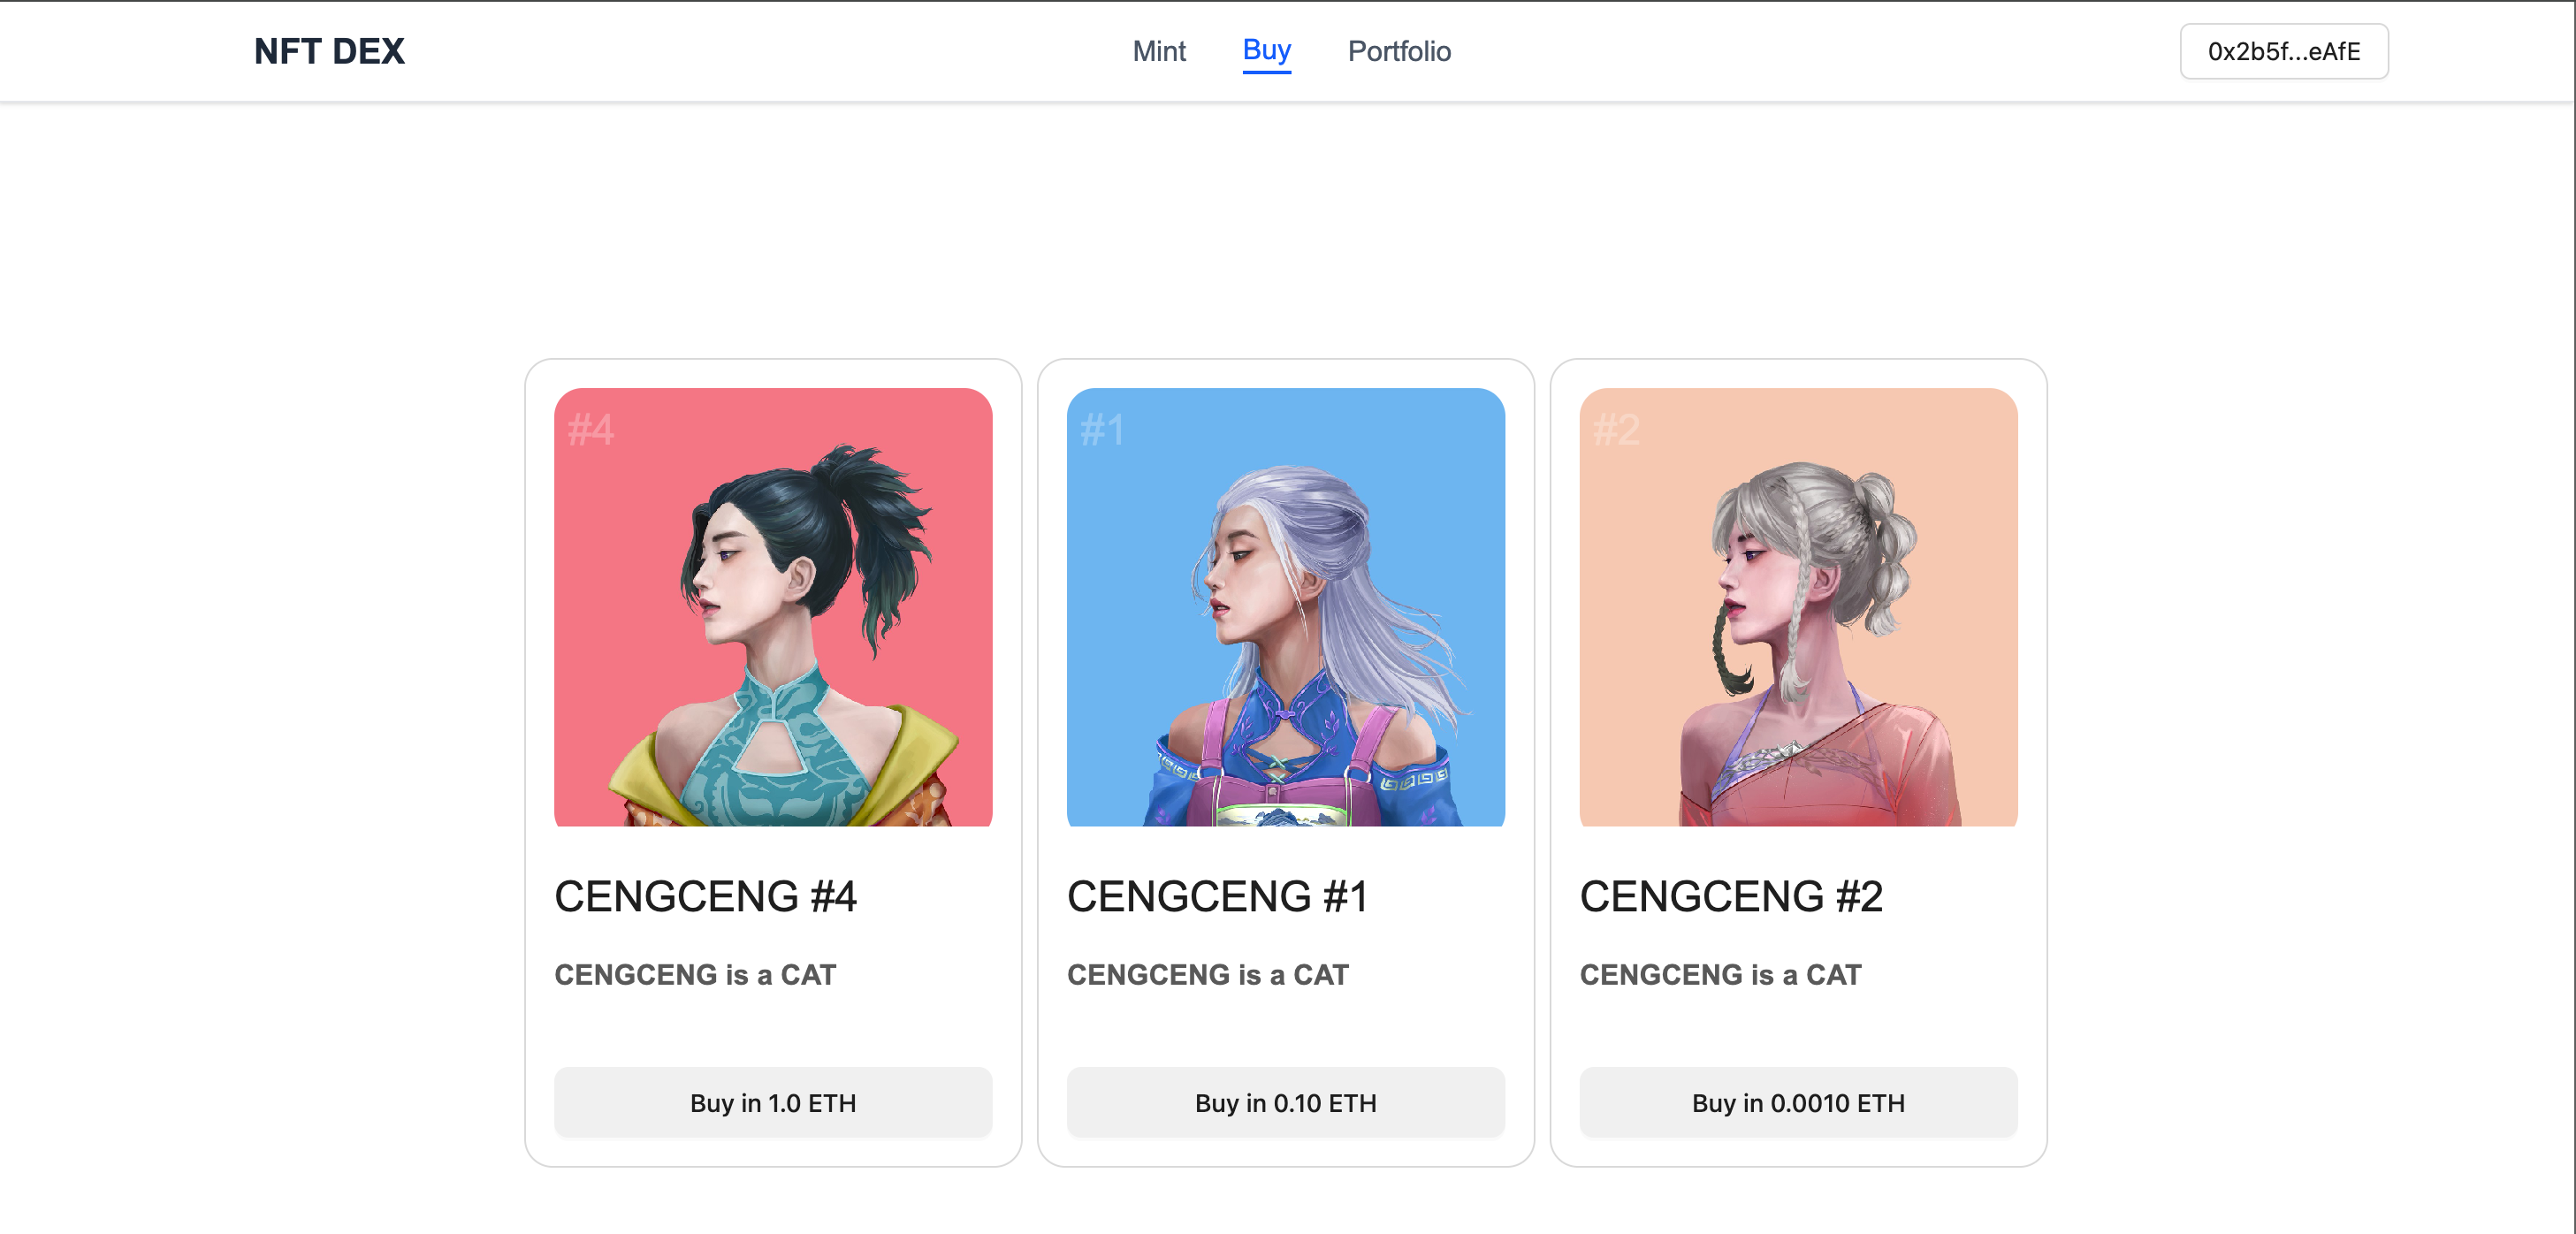
})3.4. Buy
In the Buy section, users can purchase NFTs.
First, we need to display the NFTs that have been listed. Similar to how we displayed the user-owned NFTs in the Portfolio section, the difference here is that this is a global view and needs to show only NFTs that are isAlive.
When purchasing, we can use the purchaseNFT method, and the buyer needs to pay the price in ETH.
await writeContractAsync({
  abi,
  address: dexAddress,
  functionName: 'purchaseNFT',
  args: [tokenId],
  value,
}
Here, the value is the amount of ETH that the buyer needs to pay.
With that, we have completed a front-end page for the DEX that includes all basic functionalities, and we can deploy it on Vercel.
About ZAN
As a technology brand of Ant Digital Technologies for Web3 products and services, ZAN provides rich and reliable services for business innovations and a development platform for Web3 endeavors.
The ZAN product family includes ZAN Node Service, ZAN ZK Acceleration, ZAN Smart Contract Audit (AI Scan/Expert Audit), with more products in the pipeline.